A perfect cocktail
Since I’ve been playing with Github Actions, I started to enjoy using it to build anything, so I thought about using it with Android and Firebase. Because you know, Android and Firebase always are a great mix, but now we will add a new ingredient to create a great cocktail.
Our cocktail will help us to deploy an apk file for our tester team, instead of doing it manually we are going to add our magic ingredient: a Github Action workflow!.
What will we need to create our cocktail?
- Android App: In my case I will use one of mine
- Firebase Project: We need to configure it
- Github Action workflow
1. Configuring Firebase and Firebase CLI.
Following the instructions on Firebase Documentation, we need to modify our build.gradle files for our project and our app
- Adding Google Play services to our build.gradle project file:

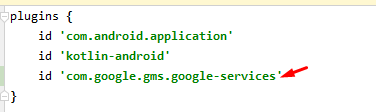
- Adding plugin to our build.gradle app file:
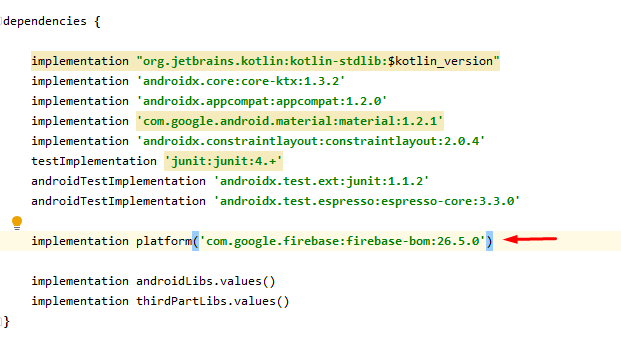
- Adding firebase-bom dependency in our gradle file:
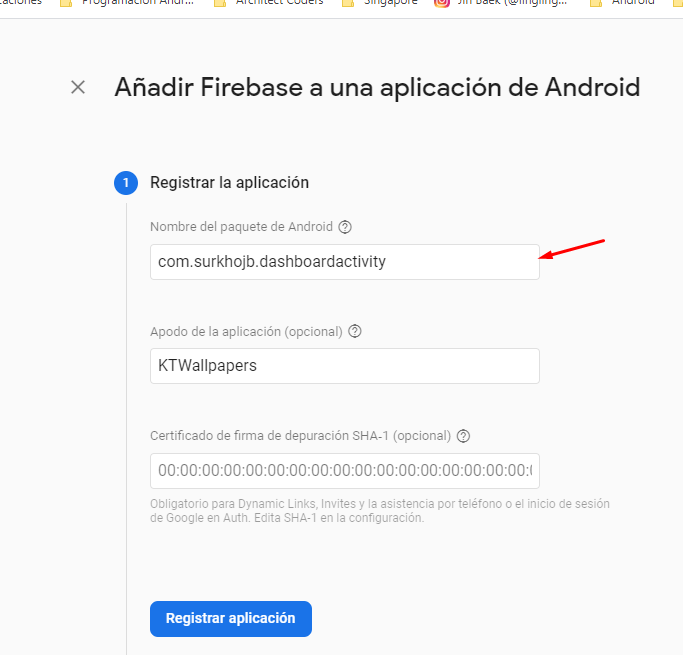
- Creating a new project on Firebase Console, we need to add our app package and an optional name:
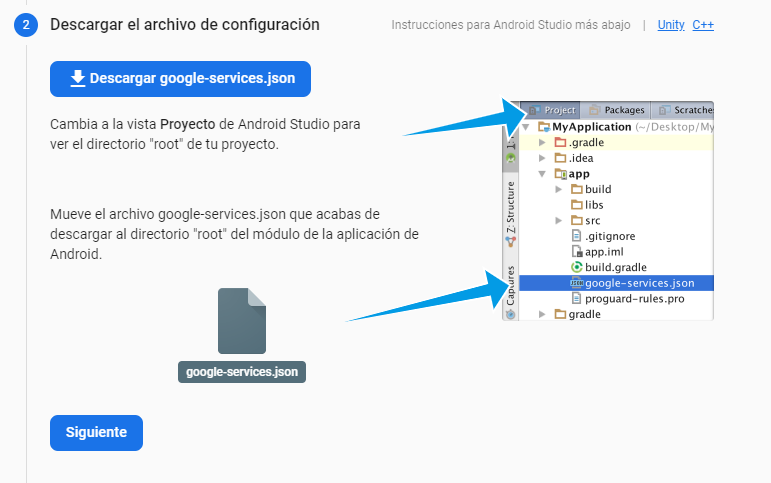
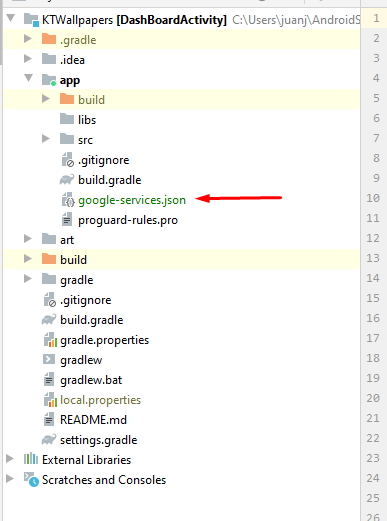
- Download google-services.json file and add it inside the app folder and sync our gradle:
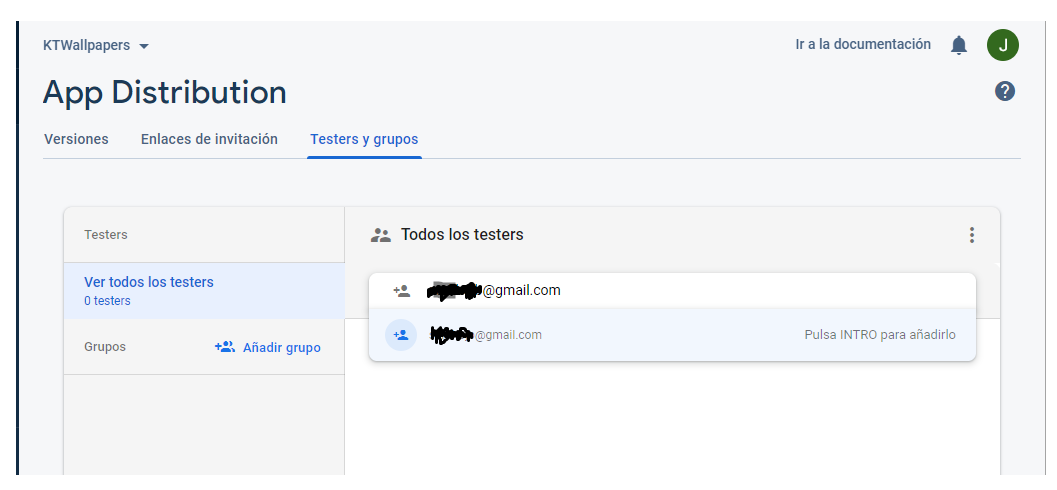
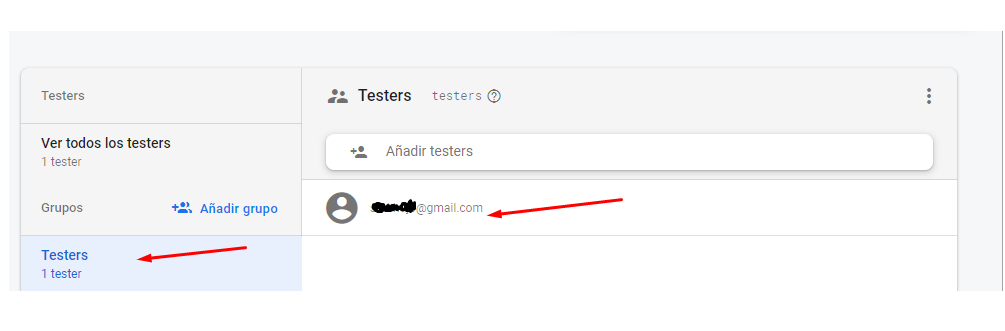
After doing this we will go to App Distribution section in our Firebase Console and adding a new email and creating a new group.
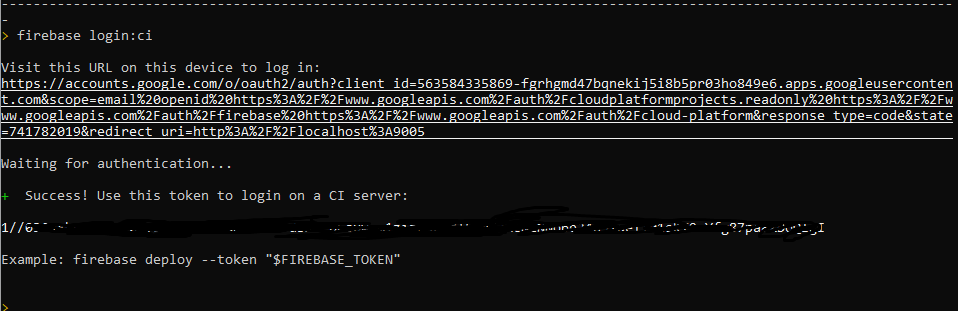
Now is time to create a token to deploy apk files from Github Actions, we have to generate this token using Firebase CLI.
- Download and execute Firebase CLI tool:

- We need to execute firebase login:ci and after login with our email it will give us a CLI Token:
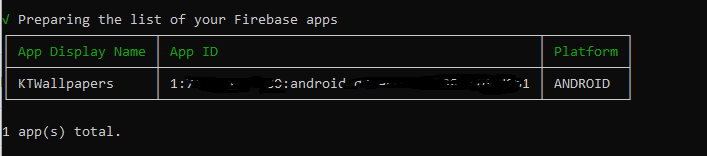
- We also need Firebase App Id, we can get our app id, running the following commands:
firebase:list project
firebase apps:list --project your_projectid
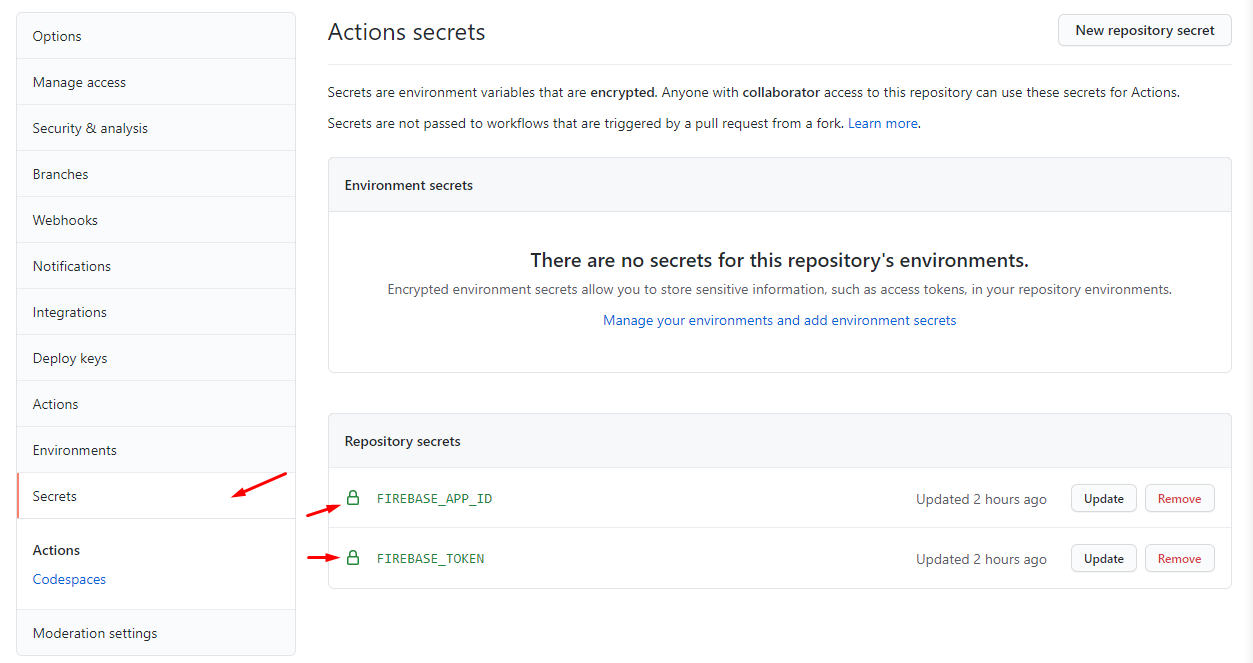
2. Configuring our Github repository
Now we need to go to Settings -> Secrets and add two new repository secret: FIREBASE_APP_ID with our Firebase App id and FIREBAE_TOKEN with our Firebase CLI token:
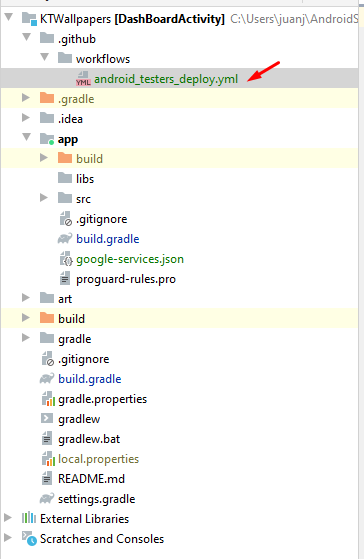
3. Creating workflow file
Now it’s time to create or workflow file inside our app project, create a folder .github/workflows and create our new yml file:
- First we add a name and when it will be triggered:
name: Android Testers CI - Deployment to Firebase
# Triggered every time master branch has a push.
on:
  push:
    branches: main

    workflow_dispatch:
- Second we will create our job, running on ubuntu machine:
build:

    runs-on: ubuntu-latest
- Creating our steps: we want to checkout the repository, set up java, build a debug apk and deploy to Firebase
steps:
      # Checkout Repo
      - name: Checkout Repo
        uses: actions/checkout@v1

      # Setting up Java 1.8
      - name: Setting Java JDK
        uses: actions/setup-java@v1
        with:
          java-version: 1.8

      # Building debug apk
      - name: Building Debug Apk
        run: ./gradlew assembleDebug --stacktrace

      # Deployment
      - name: Deploy artifact to Firebase
        uses: wzieba/Firebase-Distribution-Github-Action@v1.2.1
        with:
          appId: ${{secrets.FIREBASE_APP_ID}}
          token: ${{secrets.FIREBASE_TOKEN}}
          groups: Testers
          file: app/build/outputs/apk/debug/app-debug.apk
- At Deployment step we will need to add required parameters.
- appId: Reference to our Firebase App id
- token: Reference to our Firebase CLI token
- groups: Name of our Firebae App Distribution group.
- file: Where our apk file will be located.
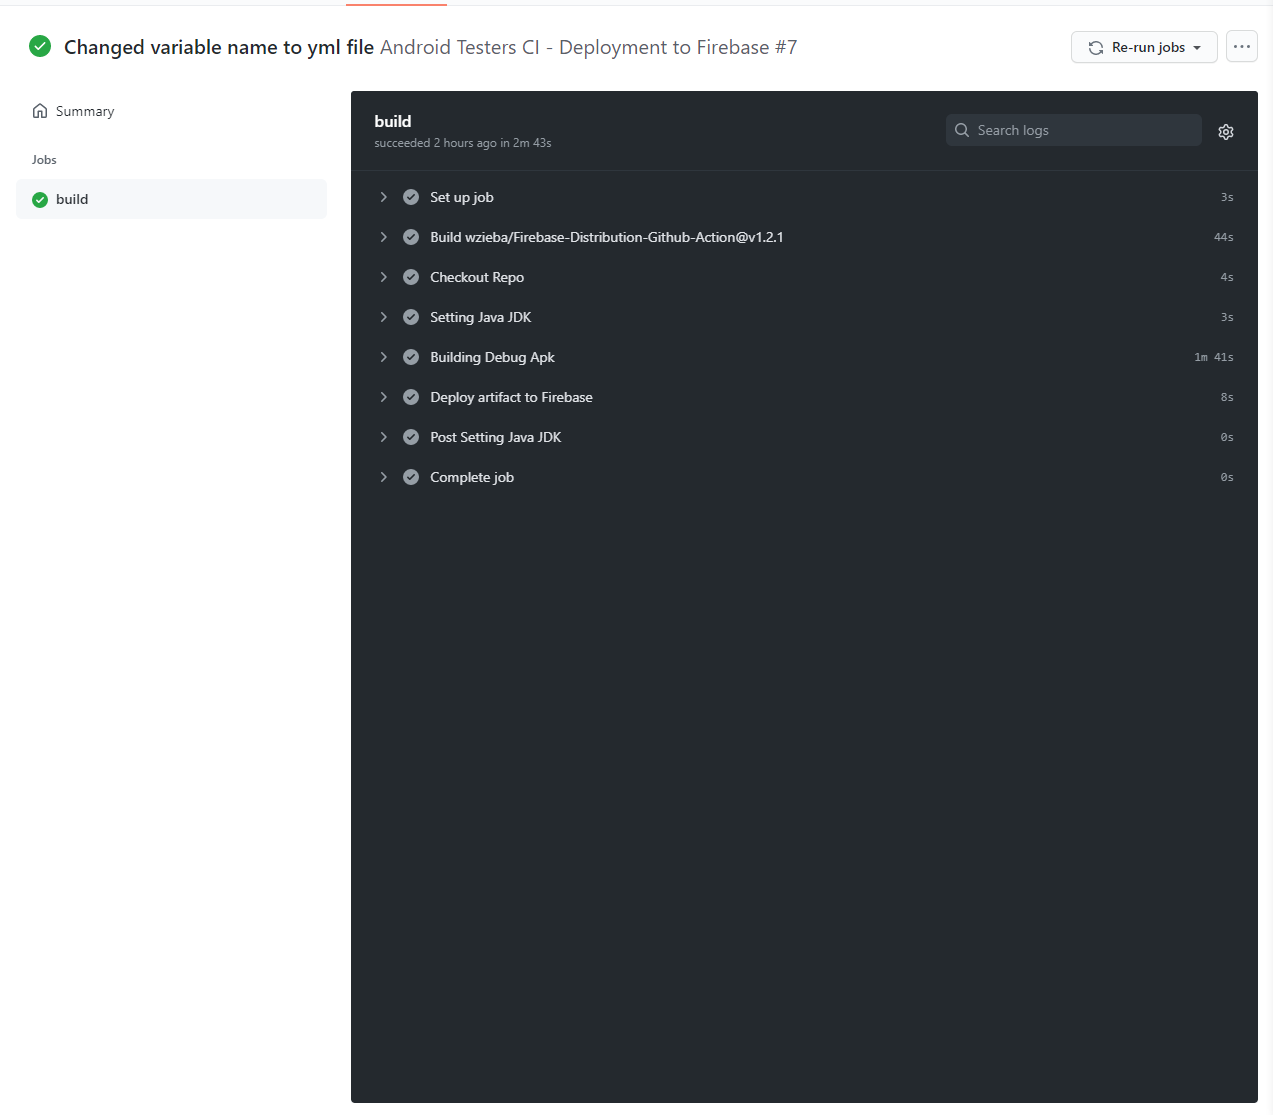
4. Enjoying our cocktail
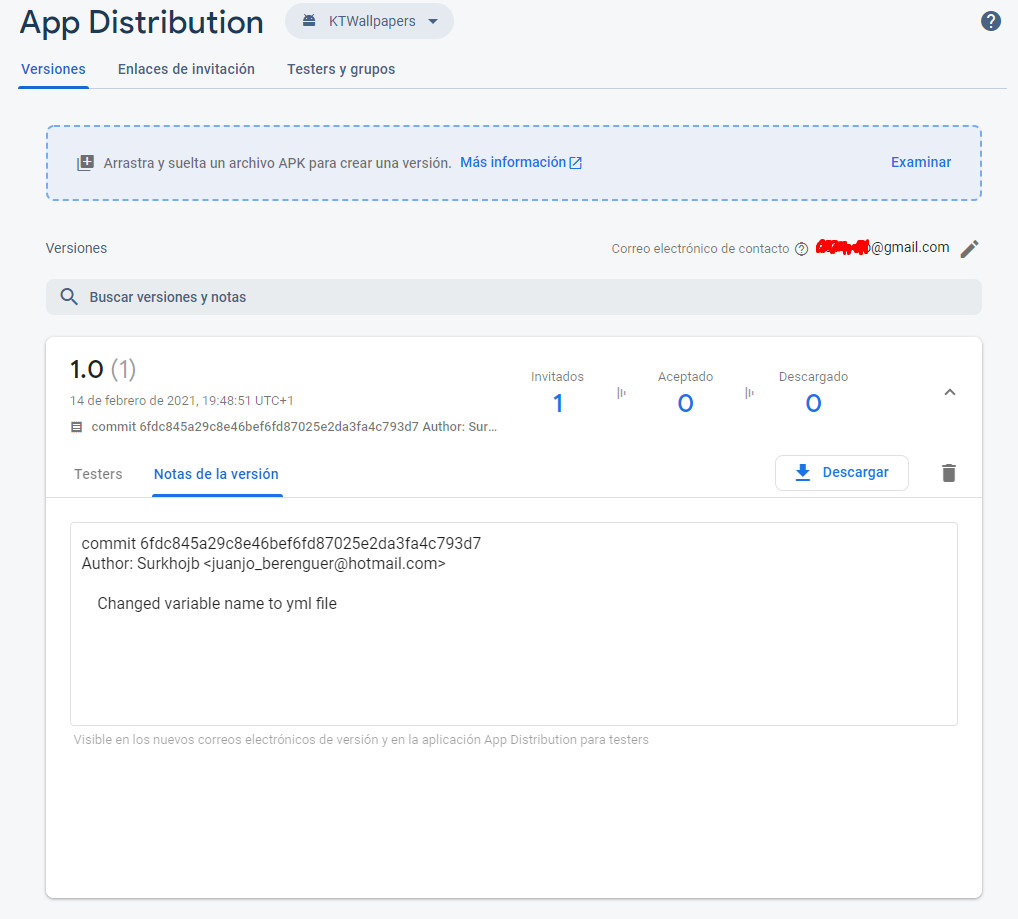
Now after all this steps it’s time to push our yml file and go to our Github repository and see how our workflow is running, after a success build, we will see our apk file uploaded at Firebase:
After doing all these steps, we created a great cocktail to deploy our versions without to much effort.
Thanks for reading. Happy coding :smiley:!
PD: Today’s dish Chicken Parmesan